I’ve always wanted to use a WPA2 Enterprise Network at home, but I do not know whether old phones will be able to connect to it. In this tutorial, I will guide you to create a EAP-PWD with Cleartext Passwords for testing the EAP AP, and the EAP-TLS with generated Certificates, I did not find any other easy to follow tutorial on how to achieve this, so I am warning you that this configuration may not be the best or worst. This is still Work in Progress.
Requirements:
– FreeRADIUS
– Hostapd (with dnsmasq)
Installation:
$ sudo apt install freeradius freeradius-utils
$ sudo apt install hostapd
Installation with use 200MB+ of disk space.
I assume that you have already configured hostapd and dnsmasq as a WPA2-PSK Access Point. To create a WPA2-EAP access point we need to reconfigure hostapd and configure FreeRADIUS. This will be a test EAP configuration, do not use for Production!
Edit the hostapd.conf
interface=wlan0
driver=nl80211
ctrl_interface=/var/run/hostapd
ctrl_interface_group=wheel

ssid=My-EAP-AP
wpa_pairwise=CCMP
rsn_pairwise=CCMP
macaddr_acl=0

#EAP Config 8021X
own_ip_addr=127.0.0.1
ieee8021x=1


auth_algs=1
wpa=2
wpa_key_mgmt=WPA-EAP

nas_identifier=other

# I had problems with this not uncommented
#disable_pmksa_caching=0
#rsn_preauth=1

#FreeRADIUS Server Config
auth_server_addr=127.0.0.1
auth_server_port=1812
auth_server_shared_secret=testing123
You can also just use another WiFi router for authenticating with RADIUS, instead of hostapd, or just use both.
Configuration of FreeRADIUS:
After the installation of FreeRADIUS, we need to try if it works. Edit the file and uncomment steve:
/etc/freeradius/3.0/users
steve    Cleartext-Password := "testing"
Stop the systemd service freeradius and run it in debug mode manually.
$ sudo systemctl stop freeradius
$ sudo freeradius -X
On another terminal, execute:
$ radtest -x steve testing 127.0.0.1 10 testing123

Sent Access-Request Id 234 from 0.0.0.0:40302 to 127.0.0.1:1812 length 75
	User-Name = "steve"
	User-Password = "testing"
	NAS-IP-Address = 127.0.0.1
	NAS-Port = 10
	Message-Authenticator = 0x00
	Cleartext-Password = "testing"
Received Access-Accept Id 234 from 127.0.0.1:1812 to 0.0.0.0:0 length 20
This means, it works. Time to comment out the steve user and change the shared secret: testing123
Let us now change to root account to make to things a little faster:
$ sudo su -
# cd /etc/freeradius/3.0/
Edit the default file:
# nano sites-enabled/default
Change ipaddr to your target IP, I would recommend this to be 127.0.0.1 or localhost, if you do not run the AP externally, do not change port, it will be default to 1812. You may want to change the interface binding to wlan0 or just eth0 depending on your configuration.
We are not going to use other authentication methods like, PAP, CHAP, MSCHAP, LDAP etc. Just uncomment the eap, files, or leave it as is.
Edit the client.conf to point to our router, in this case it will be in the same device as our freeRADIUS server:
# nano client.conf

client 127.0.0.1 {
        ipaddr = * #change to your IP
        proto = *
	secret = testing123 #change to a generated secret
        require_message_authenticator = no
        shortname = My-EAP-AP #change to your SSID name
        nas_type         = other        # localhost isn't usually a NAS...
        virtual_server = default #this point to sites-enabled/default

        limit {
                max_connections = 16
                lifetime = 0
                idle_timeout = 30
        }
}
We need to generate certificates, edit the files in the certs folder: ca.cnf, server.cnf, client.cnf
# cd certs

Example configuration below:
For the ca.cnf, edit the default_days and the req section.
default_days		= 3650

...

[ req ]
prompt			= no
distinguished_name	= certificate_authority
default_bits		= 2048
input_password		= mypassword
output_password		= mypassword
x509_extensions		= v3_ca
[certificate_authority]
countryName		= PH
stateOrProvinceName	= SomeProvince
localityName		= SomeLocality
organizationName	= Raspiblog.noblogs.org
emailAddress		= root@localhost
commonName		= "My New Certificate Athority"
Do the same for the two remaining files: client.cnf and server.cnf
server.cnf
default_days		= 3650

...

[ req ]
prompt			= no
distinguished_name	= server
default_bits		= 2048
input_password		= mypassword
output_password		= mypassword
[server]
countryName		= PH
stateOrProvinceName	= SomeProvince
localityName		= SomeLocality
organizationName	= Raspiblog.noblogs.org
emailAddress		= root@localhost
commonName		= "My Server Certificate"

For the client.cnf

default_days		= 3650

...

[ req ]
prompt			= no
distinguished_name	= client
default_bits		= 2048
input_password		= mypassword
output_password		= mypassword
[client]
countryName		= PH
stateOrProvinceName	= SomeProvince
localityName		= SomeLocality
organizationName	= Raspiblog.noblogs.org
emailAddress		= user@localhost
commonName		= user@localhost
Build the certificates:
# make
Change ownership to freeRADIUS:
# chown -Rv freerad:freerad .
# cd ..
We now need to edit the file mods-enabled/eap, we disable what we do not use. We can use the EAP-PWD for a username/password authentication without a certificate required, you can input steve/testing to make your smartphones connect,
We will use the EAP-TLS configuration, this means we need to generate a Certifcate Authority, Server Certificate and the Client Certificate.
# nano mods-enabled/eap
Comment out what we not need, PAP, CHAP, MSCHAP, LEAP, PEAP, GTC.
Example:
eap {
	default_eap_type = tls
	timer_expire     = 60
	ignore_unknown_eap_types = no
	cisco_accounting_username_bug = no
	max_sessions = ${max_requests}

	pwd {
		group = 19
		server_id = server@localhost
		fragment_size = 1020
	}


	#leap {
	#}

	#gtc {

	#	auth_type = PAP
	#}


	tls-config tls-common {
		private_key_password = mypassword
		private_key_file =  /etc/freeradius/3.0/certs/server.key
		certificate_file = /etc/freeradius/3.0/certs/server.pem
		ca_file = /etc/freeradius/3.0/certs/ca.pem
		dh_file = ${certdir}/dh
		random_file = /dev/urandom
		check_crl = no
		ca_path = ${cadir}
		cipher_list = "HIGH"
		cipher_server_preference = no
		ecdh_curve = "prime256v1"

		cache {
			enable = no
			lifetime = 24
			name = "EAP-TLS"
			persist_dir = "${logdir}/tlscache"
		}

		verify {
		}


		ocsp {
			enable = no
			override_cert_url = yes
			url = "http://127.0.0.1/ocsp/"
		}
	}

	tls {
		tls = tls-common
	}

	ttls {
		tls = tls-common
		default_eap_type = tls
		copy_request_to_tunnel = no
		use_tunneled_reply = no
		virtual_server = "default"
	}

	#peap {
	#	tls = tls-common
	#	default_eap_type = mschapv2
	#	copy_request_to_tunnel = no
	#	use_tunneled_reply = no
	#	virtual_server = "inner-tunnel"

	#}

	#mschapv2 {
	#}

}
Restart hostapd (warning may disconnect you to your network, just use a ethernet cable and ssh) and FreeRADIUS for the changes to take effect.
# systemctl restart hostapd
# systemctl restart freeradius
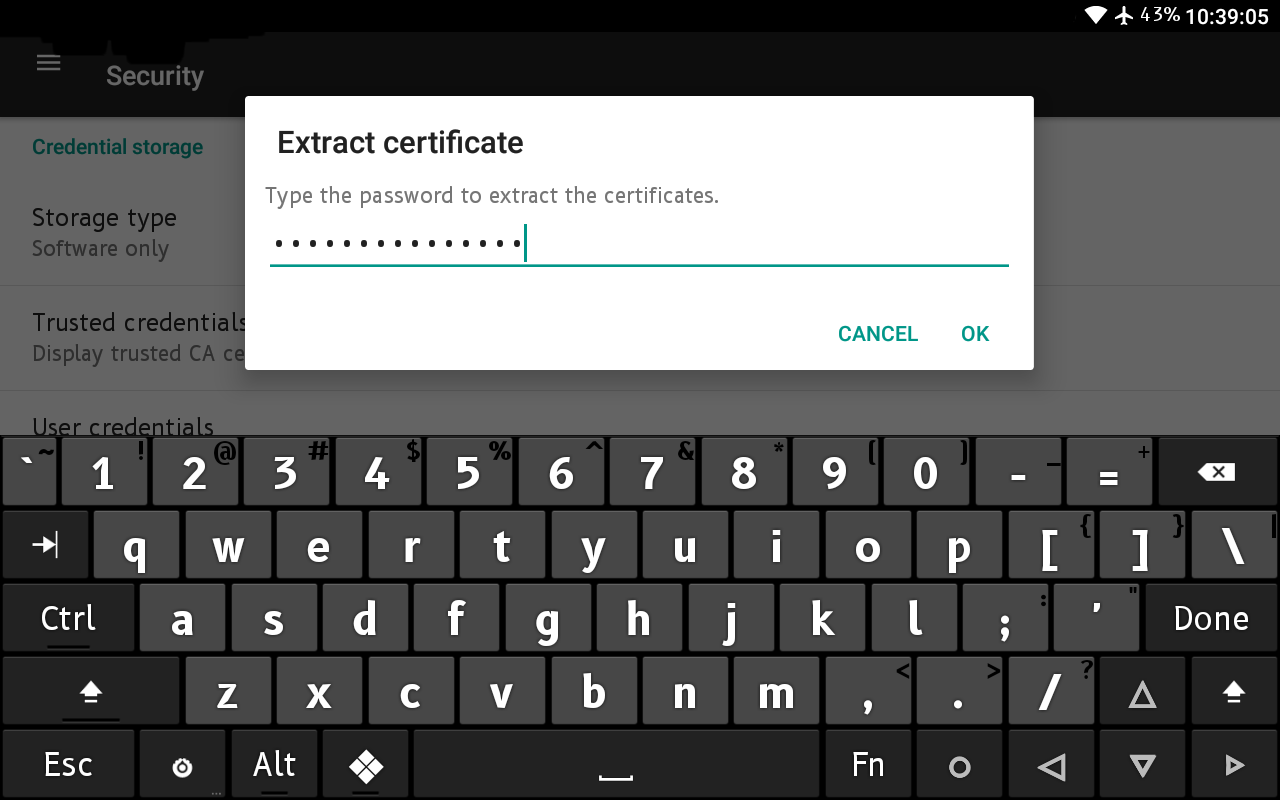
Note: To connect the client, you need to copy the client.p12 certificate from the certs directory and the ca.pem. and install them to your Android smartphone. You need to enter your client certificate passphrase.! This is still a Work-In-Progress

WiFiAnalyzer detecting a WPA2-EAP Access Point

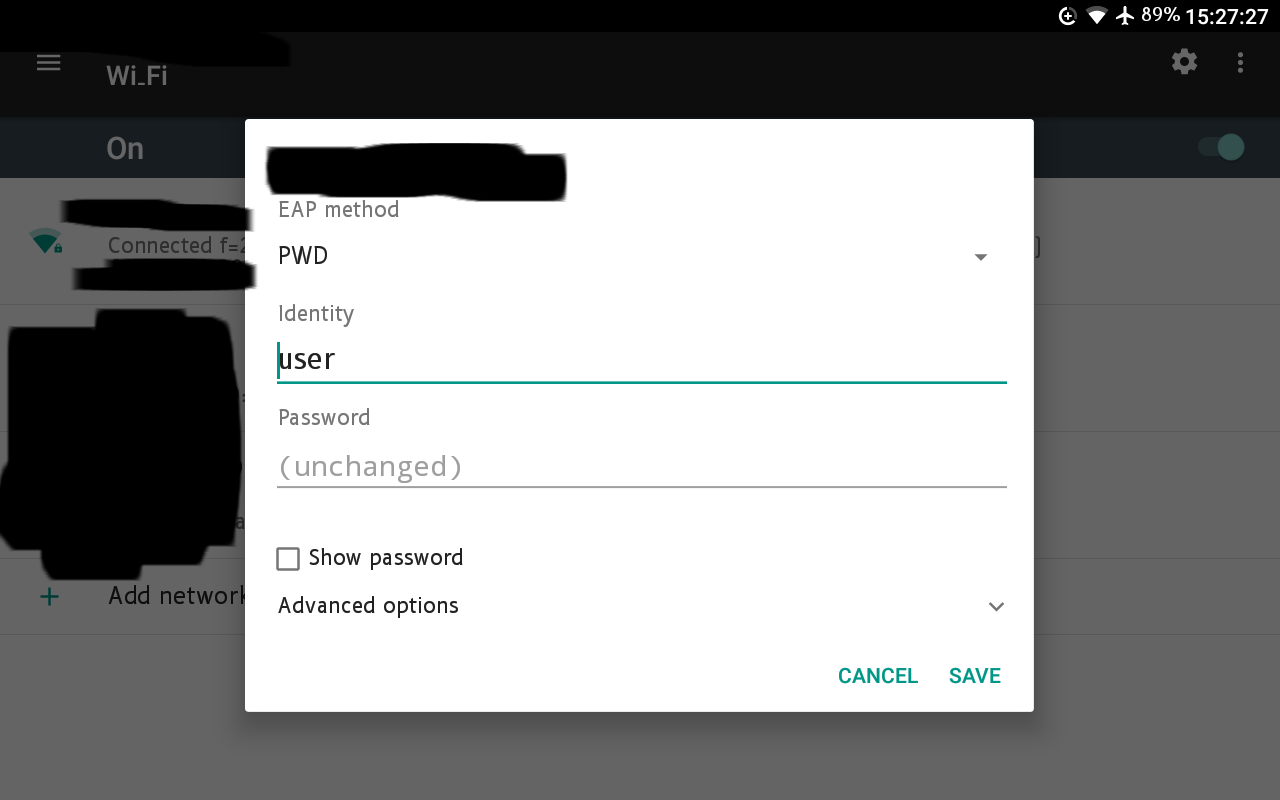
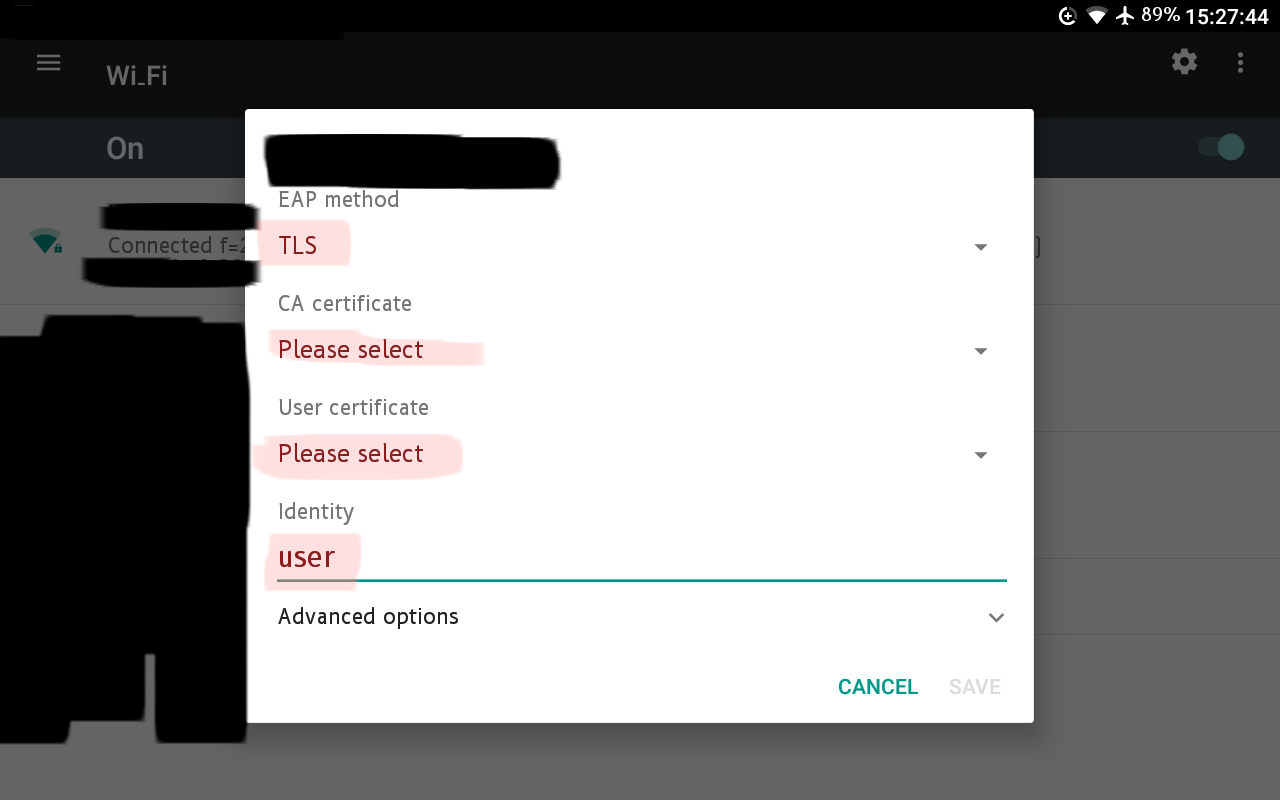
Choose your authentication method:
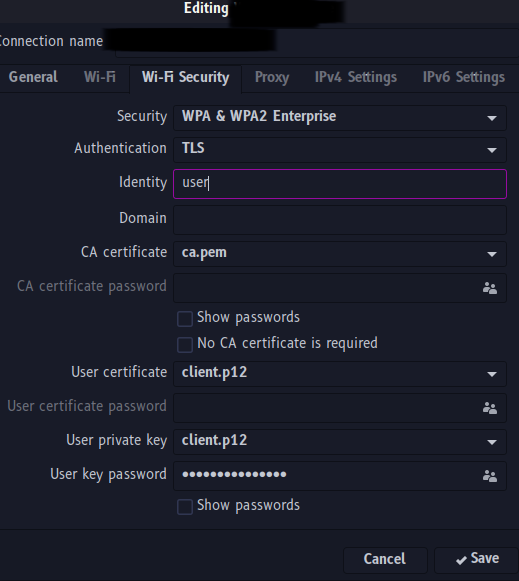
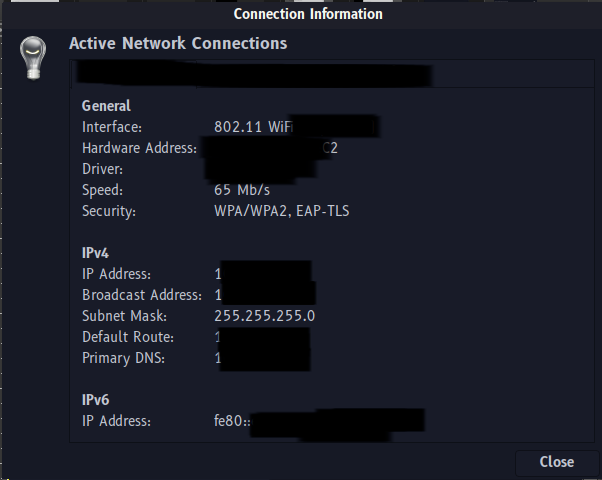
On a GNU+Linux Network Manager, you can choose your authentication method too:
I do not recommend to deploy this tutorial for Production use, this is still a Work In Progress (WIP). It may be easier to manage users using LDAP instead of PWD.
References:
https://me.m01.eu/blog/2012/05/wpa-2-enterprise-from-scratch-on-a-raspberry-pi/
https://framkant.org/2015/11/wpa2-enterprise-with-hostapd/
https://framkant.org/2015/11/wpa2-enterprise-with-hostapd/
http://www.rinta-aho.org/docs/wlan/hostapd.conf
https://gist.github.com/noahwilliamsson/f2714e63e5959ffa9c92
https://github.com/sensepost/hostapd-mana/wiki/Creating-PSK-or-EAP-Networks
https://me.m01.eu/blog/2012/05/wpa-2-enterprise-from-scratch-on-a-raspberry-pi/
https://wiki.freeradius.org/guide/WPA-HOWTO#table-of-contents
| © R1BNC, licensed under CC BY-SA 4.0 |