PART 2 – Teardown of AC/DC Adapters
WARNING:
In this project, We will be dealing with the AC MAINS which can kill you instantly. Observe proper procedures and precautions when dealing with the mains’ electricity.
1. Make sure you removed all your metal jewelries that can accidentally come in contact with the live(hot) or neutral wire.
2. Use only your one hand, preferably wear an insulated glove when dealing with AC mains, put your other hand at your back, so if you accidentally touched the mains it will not flow in to your chest cavity.
3. Always get another person observing you if you are dealing with the mains.
4. Anything above 12V can shock you and 0.50A of current can stop your heartbeat.
CAUTION:
Electrostatic Discharge (ESD)
All microcontroller and digital Integrated Circuit devices are sensitive to ESD, they may be destroyed by it instantly. Before unboxing or removing them in protective anti-static packaging, please ground yourself to a metal chassis or doorknob or wear an anti-static gloves.
This post is about the other AC/DC Adapter that I recycled from the last post. I plan to use the unregulated DC power supply to run the ESP8266 board.
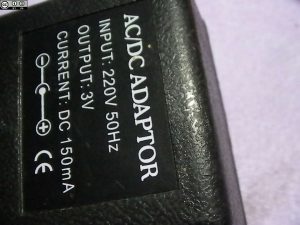
The 5V unregulated PSU. Labeled as 3V! There are no certification marks.
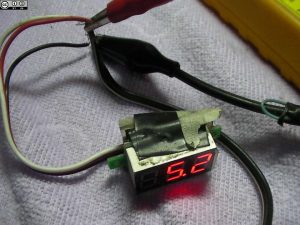
Actual Voltage output
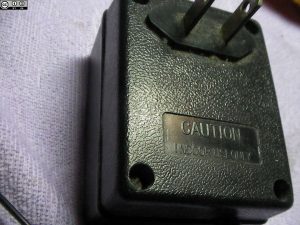
The back of the unregulated PSU.
Dimensions (LxWxH): 63mm x 49mm x 38mm
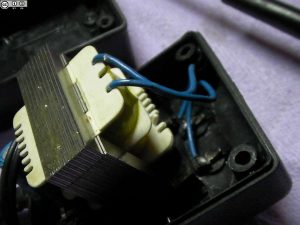
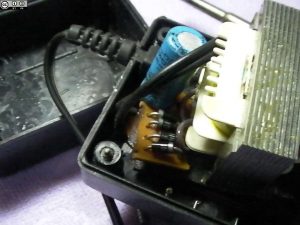
Disassembly
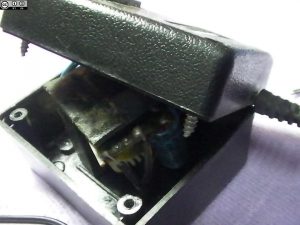
No safety fuse, no transient voltage suppressor.
Bridge Rectifier (1N4007) and a Filtering Capacitor 16V 470uF
Maybe I can fit an ESP8266 board like ESP-01, ESP-07 or ESP-12E?
The improved design of the power supply.
PDF Schematic Made with geda
3v3LDOPS
Circuit Schematic PNG
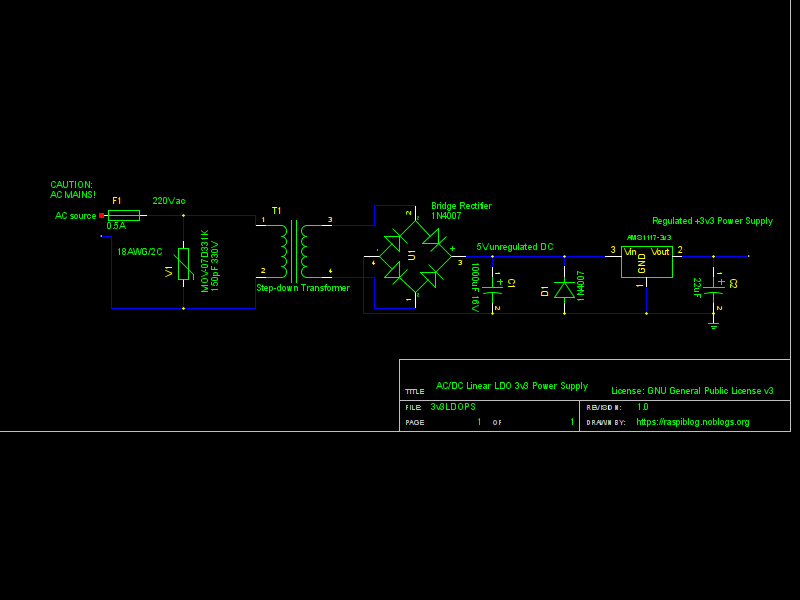
AMS1117-3v3 LDO

not so LDO
I am planning to add a Metal-Oxide Varsistor (MOV) and a fuse holder (if I can fit it) in the AC side. Solder an AMS1117-3v3 (PHP 5.00) and a 22uF tantalum capacitor to create a regulated linear power supply. According to the datasheet the AMS1117 has a maximum input of 15V, has a 1V dropout voltage which means you need to have 4.3V input to make the output 3.3V. The AMS1117 has a max quiescent current of 10 mA (this means it will eat 10mA of current even if the ESP8266 is at deep sleep) which makes it impractical for battery powered circuits, but makes it ideal for AC main’s powered. For battery friendly voltage regulators we need to use a MCP1700 or HT7533 they have low quiescent current, but I cannot buy them per piece only bulk. According to the datasheet the Wemos D1 mini, it has an ultra low dropout voltage regulator that can accept input voltages from 2.7V to 5.5V but I have not tried it yet.
I will update this post after adding the AMS1117, MOV and Fuse. I do not have any money to buy an ESP-01 to try to fit in the casing.
Except where otherwise noted, this work is licensed under Creative Commons Attribution-ShareAlike 4.0 International License (http://creativecommons.org/licenses/by-sa/4.0/).
I hope that this post is useful to you, if you liked this post you may support me via liberapay. Thank you for your support.

Related: